The best image labeling tools for Computer Vision
Dmitrii Iakushechkin
Creating a high quality data set is a crucial part of any machine learning project. In practice, this often takes longer than the actual training and hyperparameter optimization. Thus choosing an appropriate tool for labeling is essential. Here we will have a closer look at some of the best image labeling tools for Computer Vision tasks:
We will install and configure the tools and illustrate their capabilities by applying them to label real images for an object detection task. We will proceed by looking at the above tools one by one.
Our collection of computer vision content also clearly shows how central the use of such labeling tools is for us as machine learning specialists.
The data set
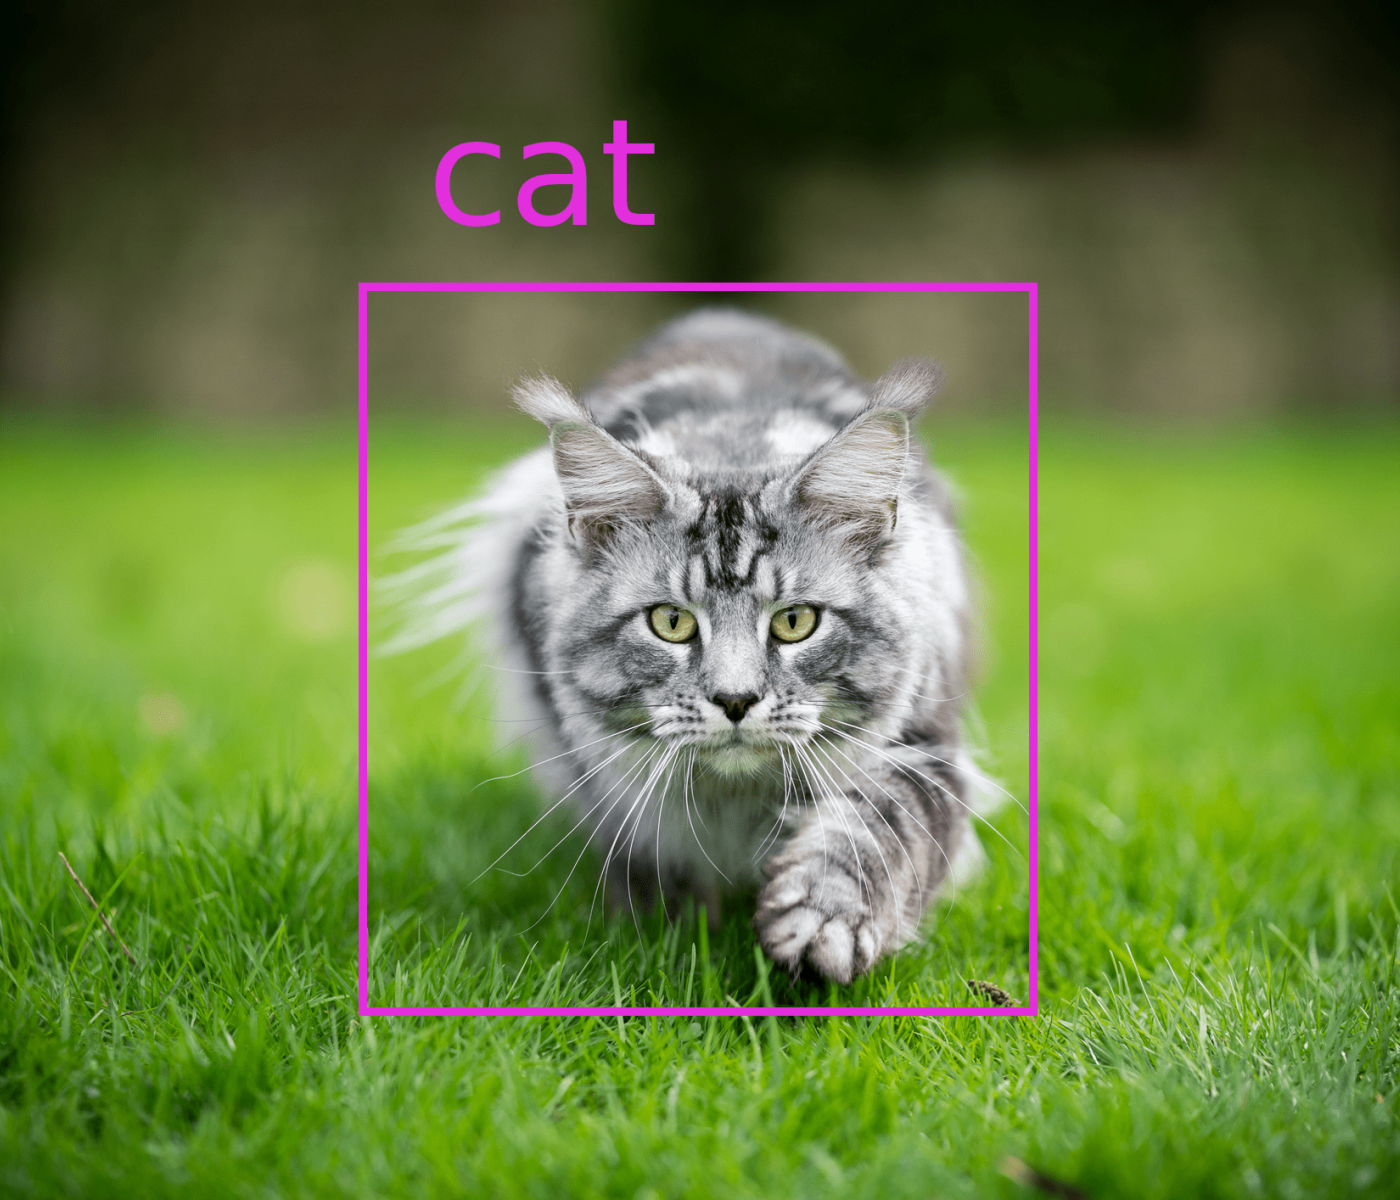
We are going to label images from the COCO Dataset. Common Objects in Context (COCO) is a well-known dataset for improving understanding of complex daily-life scenes containing common objects (e.g., chair, bottle or bowl). The dataset is designed to stimulate computer vision research in the field of object detection, segmentation and captioning. The COCO dataset consists of 330K images and 80 object classes.
We will use only 26 images with 2 classes (cat and dog) that would be sufficient for our study because today we don’t focus on training models, and our goal is to review the labeling tools.
labelme
What you can do with it
labelme is a python-based open-source image polygonal annotation tool that can be used for manually annotating images for object detection, segmentation and classification. It is an offline fork of online LabelMe that recently shut down the option to register for new users. So, in this post, we are only considering labelme (lowercase).
The tool is a lightweight graphical application with an intuitive user interface. With labelme you can create: polygons, rectangles, circles, lines, points or line strips.
Generally, it is often handy to be able to export annotations in well-known formats such as COCO, YOLO or PASCAL VOL for after-use. In labelme, however, the labels can only be saved as JSON files directly from the app. If you want to use other formats, you can use a Python script from the labelme repository to convert annotations to PASCAL VOL.
Nevertheless, it’s a fairly reliable app with a simple functionality for manual image labeling and for a wide range of computer vision tasks.
Installation and configuration
labelme is a cross-platform application that can work on multiple systems, such as Windows, Ubuntu or macOS. The installation itself is pretty simple and well described here. For example, on macOS, you need to run the following commands in the terminal:
Install dependencies:
brew install pyqtInstall labelme:
pip install labelmeRun labelme:
labelme
Usage
The general approach:
Choose the directory
Open Dirwith your images.Go to
File->Change Output Dirand choose the output folder.(Optional) Enable automatic saving so that you don't have to do it manually after labeling each image:
File->Save Automatically.Go to
Editand select the appropriate option (e.g.Create Rectangle).Name an object.
Go to
Editand selectEdit Polygons.
Shortcuts:
Create rectangle: ⌘ + E
Edit polygons: ⌘ + J
Next image: D
Previous image: A
labelImg
What you can do with it
labelImg is a widely used open-source graphical annotation tool. It is only suitable for object localization or detection tasks, and it’s solely able to create rectangle boxes around considered objects.
Despite that constraint, we would like to suggest this tool because the application is only focused on creating bounding boxes which simplifies the tool as much as possible. For this task, labelImg has all the necessary functionality and convenient keyboard shortcuts.
Another advantage is that you can save/load annotations in 3 popular annotation formats: PASCAL VOC, YOLO, and CreateML.
Installation and configuration
The installation is well described here. Also note that labelImg is a cross-platform application. For example, for MacOS, the following actions are required on the command line:
Install dependencies: First
brew install qt, thenbrew install libxml2Select the location of the folder to install.
When you are in the folder, run the following:
git clone https://github.com/tzutalin/labelImg.git,cd labelImgand thenmake qt5py3Run labelImg:
python3 labelImg.py
Developers strongly advise using Python 3 or higher and PyQt5.
Usage
The general approach:
Define the list of classes that will be used in
data/predefined_classes.txt.Choose the directory
Open Dirwith your images.Choose the output folder
Change Save Dir.Select the annotation format.
Shortcuts:
Create rectangle: W
Next image: D
Previous image: A
CVAT
What you can do with it
CVAT is an open-source annotating tool for images and videos for tasks such as object detection, segmentation and classification.

To use this tool, you don’t have to install the application on your computer. It is possible to use the web version of this tool online. You can work collaboratively as a team on labeling images and divide the work between users.
There is also a great option that allows you to use pre-trained models to automatically label your data, which simplifies the process for the most popular classes (for example, those included in COCO) if you use existing available models in the CVAT dashboard. Alternatively, you can also use your own pre-trained models.
CVAT has the widest set of features from the tools we have already considered. In particular, it allows you to save labels in about 15 different formats. The full list of formats can be found here.
Installation and Configuration
A comprehensive guide on how to set up your system, run docker containers and start working with the program can be found here.
We won’t rewrite the guide, but note that you can use the online version for testing CVAT. We will use this version to demonstrate how labeling works for the object detection task.
Usage
In the video, we showed how to use a Faster R-CNN for the object detection task to automate the labeling. But the general approach is as follows:
To use CVAT, you need to register and log in.
Navigate to the
Taskstab and create a new one.Fill out the form for this task, add labels, images and submit.
Open the task you just created.
Start labeling by selecting the rectangle shape and the object class and so for all objects in the image.
Save the progress after you finish with the first image and navigate to the next one.
When you finish with all your images, navigate back to the
Taskstab and dump annotation in the format you need.
Shortcuts:
Create rectangle: Shift + N, N
Save the progress: Ctrl + S
Next image: F
Previous image: D
hasty.ai

What you can do with it
Unlike all of the above tools, hasty.ai is not a free open-source service, but it is very convenient for labeling data due to the so-called AI assistants for object detection and segmentation. Automatic supports allow you to significantly speed up the annotation process since an assistant model is training during the labeling. In other words, the more images are labeled, the more accurately the assistant works. We will look at an example of how that works below.
A recently added feature is the Atom tool, where you simply click in the middle of an object and the AI assistant annotates it automatically. There is also a beta version of the Model Playground, which allows you to try out different architectures and parameters in order to improve the performance of the AI assistant model.
You can also try out this service for free. The trial provides 3000 credits, which is enough to automatically generate suggested labels of about 3000 objects for an object detection task.
hasty.ai allows you to export data in the formats COCO or Pascal VOC. You can also work as a team on a single project and assign roles in the project settings.
After you run out of free credits, hasty.ai can still be used for free, but labeling will be completely manual. In this case, it is better to consider the free tools described above.
Configuration
To use the tool, you need to register on hasty.ai.
Log in to your account.
Click on
create a new project.Fill out the form with the name and description and navigate to the project settings, where you can define classes under consideration, add data for this project.
Also, you can add other users to work together on the project. The credits will be used from the account of the user who shared the project.
Usage
You can use the tool in a manual mode right after the configuration, but in order to take advantage of the AI assistant, you need to manually label 10 images and change their status from new to review or done. After that, the assistant can be used.
After the labeling process is complete, you can export the annotations in different formats, such as COCO or Pascal VOC.
Shortcuts:
Create rectangle: R
Edit rectangle: M
Use object detection assistant: J
Atom tool: C
Labelbox
What you can do with it
Labelbox is a powerful annotation tool that can be used to label images for object detection, segmentation and classification. Additionally, text data can be annotated for Natural Language Processing tasks.

In general, the tool comes with costs, but the free trial allows you to make 10,000 annotations in a small team of maximum five people.
Labelbox is web-based and has a clearly designed project overview page with helpful statistics, e.g. the average time spent per label. The labeling page is also very intuitive and easy to use.
Annotations can be exported in the webbrowser only as JSON files. Beyond that, Labelbox has developed a Python SDK to access the API, which allows you to export the labels directly within a Python script.
Configuration
The general approach:
To use Labelbox, you have to register and login.
On the projects site, click on “New project”.
Enter your project name and optionally a description.
Now you can add data to your project. Either you select an existing dataset or you create a new one. You can create a dataset also via the Python SDK.
Then you have to configure the editor. You can define multiple objects for segmentation tasks and how you mark them (e.g. with a polygon, polyline or bounding box) or classifications for global assessments of the data.
In the last step, you can select some settings relating to quality assurance.
Conclusion
We've covered five different annotation tools and considered each tool’s advantages and disadvantages:
labelme can be used for various computer vision tasks, but it involves only manual labeling. However, the tool can be installed and configured very quickly. The tool may be suitable for those who want to annotate a small dataset.
labelImg is fit for tasks where only one user will be engaged in labeling for an object detection task. It is also very fast to install and use. Also, it supports various well-known annotation formats.
CVAT is appropriate for those who work in a team and want to utilize their model to automate the labeling process.
hasty.ai is not a free tool, but its advantage is that it has built-in assistants that allow you to generate suggested labels after manually annotating 10 images in the dataset, which makes image labeling easier and faster.
Labelbox is not free either, but easy to use, versatile and coming with useful extra functionality.
Now that you have an overview of image annotation tools, we recommend that you read our case studies on computer vision projects to gain further insights into the development of such projects.
If you are interested in an initial, informal discussion with a project manager or machine learning scientist, please take a look at our free offers for machine learning exchanges.